
Ingredients
A per-brand library of the products, logos, and references Awa actually uses — upload them, import from a URL, or draw your own, then drop them into any prompt with @.
Updated 2026-06-13
Overview
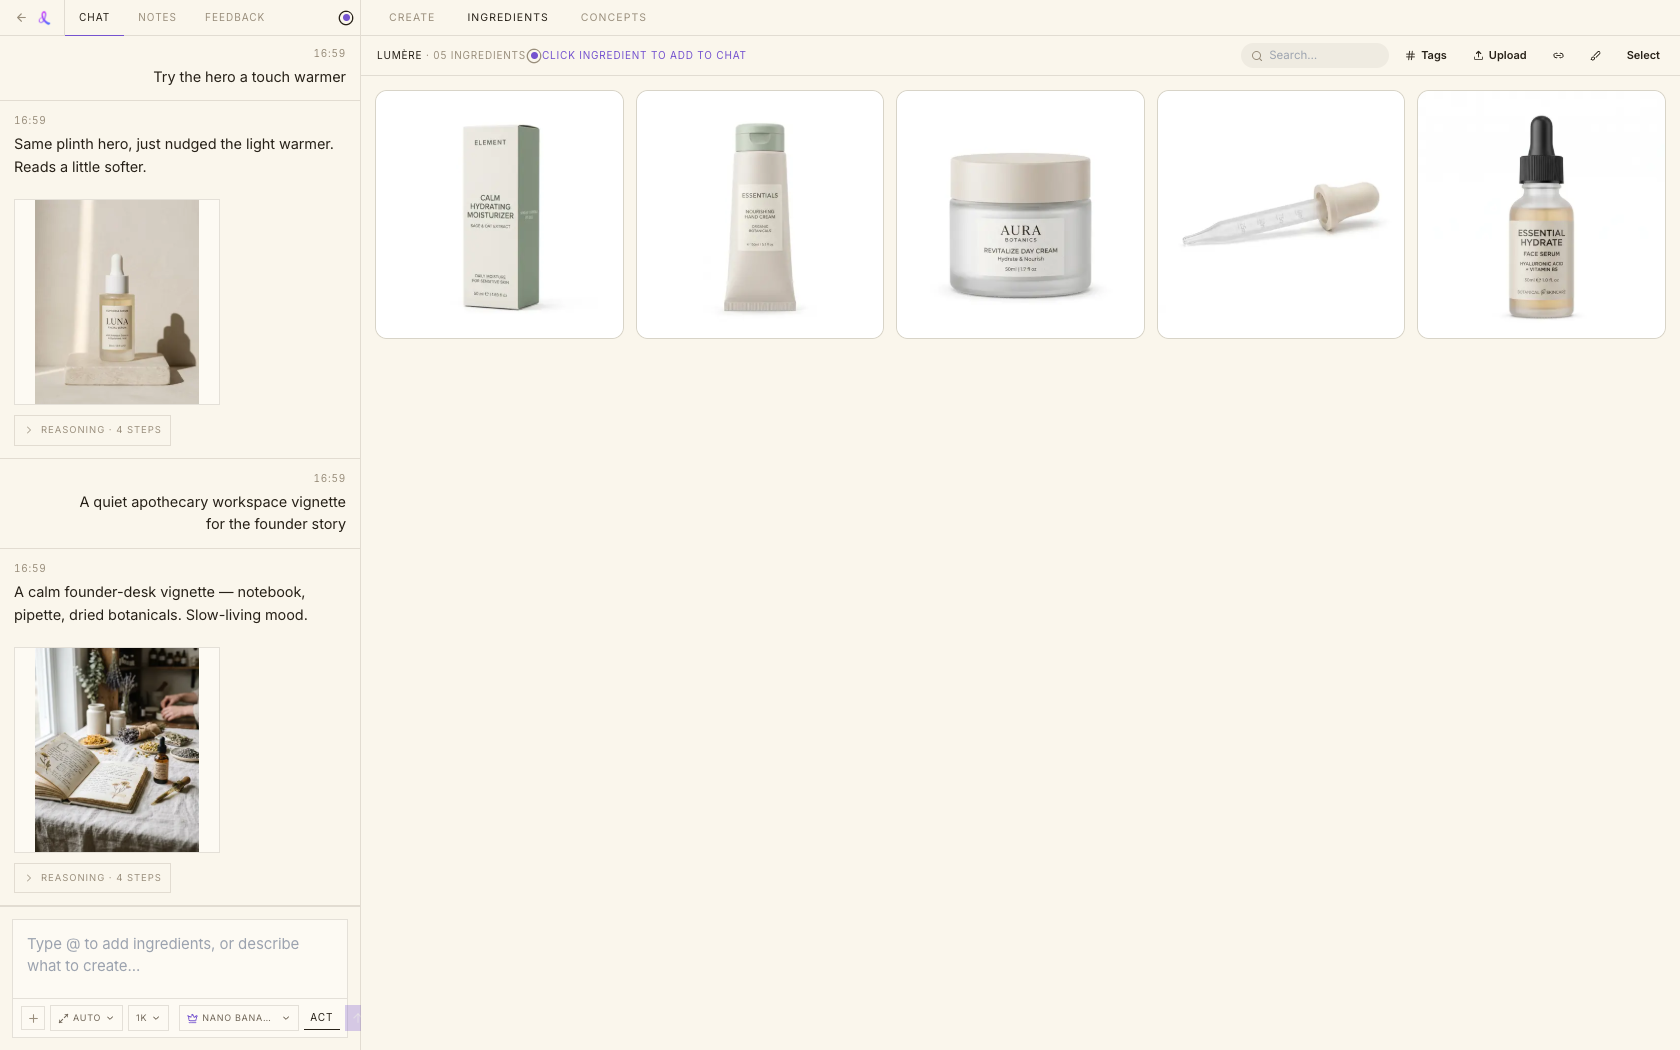
Ingredients are the real things your shots are built from — your product photos, logos, and reference images. The Ingredients tab is a brand-wide library that lives inside every campaign workspace: whatever you add belongs to the brand named in the header and is available to every campaign under it. When you attach an ingredient to a prompt, Awa builds the shot around the actual asset, so a real product photo beats a paragraph of description every time.
How it works
Open any campaign and switch to the Ingredients tab. The whole tab is a drop target — drag files anywhere onto it (a dashed purple overlay confirms the drop). The images themselves are the star: a gallery-style masonry mosaic at their natural aspect ratios, with name, tags, and the info bubble revealed on hover. A compact header row carries the brand and count on the left, and search, the # Tags filter, Upload, URL import, Draw, and Select on the right.
Tags are yours to manage. Toggle # Tags to reveal a frequency-sorted chip strip (with per-tag counts and a +N more expander) and narrow the grid, or search by name. Nothing gets auto-tagged behind your back — the only path that writes AI tags is the explicit AI analyze action on a selection.
To use an ingredient, attach it to a message in the chat composer with @ (or the plus button). Awa builds the shot around exactly the assets you pick — up to 10 per message. You can also paste or drop an image straight onto the composer: it uploads as a brand ingredient and attaches itself, ready to send.
Ways to add ingredients
- Upload — drag-and-drop anywhere on the tab, or click Upload. Up to 10 files per batch; each file up to 3.5 MB.
- Import from a URL — the link icon opens a small popover with a URL field. Paste a Shopify product page (/products/…) to multi-select its images, or search and import from Pinterest.
- Draw — open a focused canvas with pen, eraser, colors, size, undo/redo, and clear; name it and save it as an ingredient.
- Save from a frame — promote a generated frame into an ingredient from the Create info drawer, so a result you love becomes a reusable reference.
- Prep, then save — from an ingredient's detail drawer, Open Prep to crop, resize, remove the background, or upscale, then Save as new. The original source is always preserved.
Related articles
Didn't find what you needed?
Tell us what you're stuck on — a real human reads every message and replies within 24 hours on business days.